Hi,
we have added Zammad as a supported app for the Toggl time tracking Button.
The repository is available here: https://github.com/ecomsilio/toggl-button-ecomsilio
We will update it with some refinements in the next few days. Stay tuned. When all is working fine, we will submit a pull request to the original Toggl Button repository so that you can install the Chrome add on from the Chrome Web Store.
https://github.com/ecomsilio/toggl-button-ecomsilio
How does it work?
Installation
First clone the repository: git clone git@github.com:toggl/toggl-button.git
Then depending on your browser, continue with the following steps.
On Chrome:
- Navigate to
chrome://extensions/and enable “Developer Mode”. - Choose “Load unpacked extension…”
- Open the src directory in the toggl-button directory you just cloned and follow the prompts to install.
On Firefox:
- Rename the
manifest.jsonfile tomanifest_chrome.json - Rename the
manifest_ff.jsonfile tomanifest.json(note: switch them around again if you want to use Chrome) - Navigate to
about:debugging - Choose
Load Temporary Add-on - Open the src directory and select the
manifest.jsonfile
Note that in Firefox the add-on needs to be manually loaded again when the browser restarts.
Settings
Press extension icon in the browser bar and press the gear icon to open the setting.
Navigation to the 3rd tab Permissions
For zammad.com hosted installations
- Scroll down in the list with service and select the checkbox for zammad.com
For zammad.org self-hosting
- Scroll down to the bottom of the screen and define your custom domain there. Just type in the domain name without http(s) in format “mydomain.com” or “support.mydomain.com” (if you use a subdomain) and select Zammad from dropdown and press Add.
Using the Button
- Log in to your Toggl account from the extension popup.
- Navigate to your Zammad installation, open a ticket and start your Toggl timer there
(or start entry from the extension icon menu.)
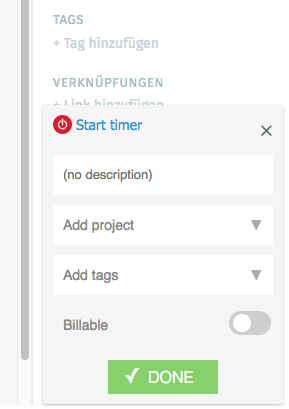
To edit the running time entry
- Edit entry details from the post start popup that is shown right after you click the “Start timer” button
- Edit entry details from the extension icon menu by clicking the running time entry name
To stop the current running timer:
- Press the button again
- Stop the entry from the extension icon menu
- Start another time entry inside your account.
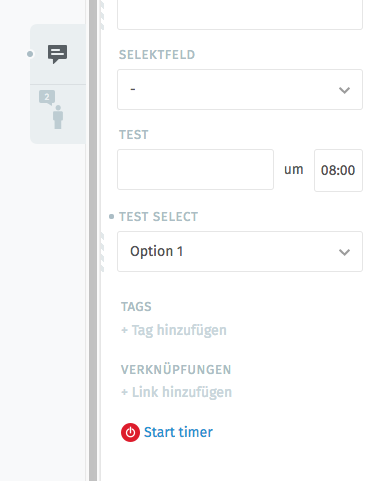
Toggl Project
Per default the add-on passes the ticket number and the title as a toggl project. The ticket number is in square brackets. For example
[12345] Here is my ticket title
If the project is not available in toggl, then the value will be ignored and you can select your own project.
Screenshots
Issues
Currently we are not happy with the position of the button. First we added the button at the top of a ticket, next to the marking wrench.
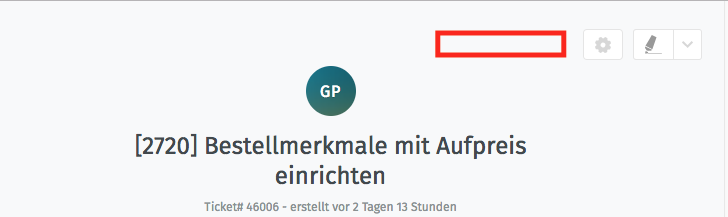
The problem here is, that as soon as you scroll down, a sticky header is being displayed which has different classes and which makes the button disappear. We can’t include the button twice on the side, so this was no good option. Especially since we discovered a small glitch in Chrome.
Glitch details
When you open a ticket which has only a small part of content and where there is no need to scroll, the page still display a scroll bar and shows the sticky header at the top. In order to make the sticky header to disappear, you will habe to scroll up.

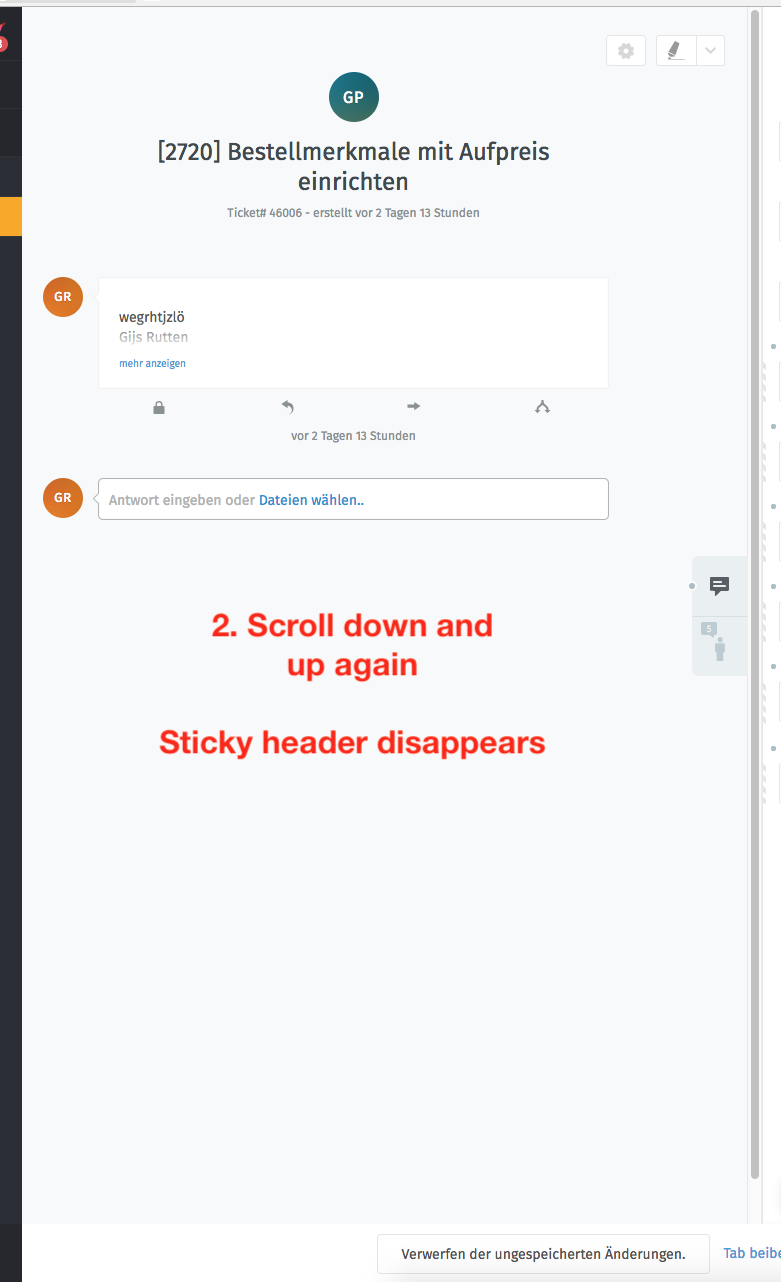
Chrome 67.0.3396.99 on Mac OS 10.13.5
We have then decided to put the button in the sidebar. The problem here is, that the button will only show one time. As soon as you open another ticket, somehow the sidebar is not reloaded completely and therefore doesn’t show the toggl button again. You will have to reload the page completely to make the button appear again.
We will try to put the button in the footer next to the “Update ticket” button.
Maybe @anon29869905 has some idea or can tell us which part of the ticket detail view would be best to put the button at.
Let us know your feedback or improvement and have fun using the toggl button.
Thanks,
Gijs
