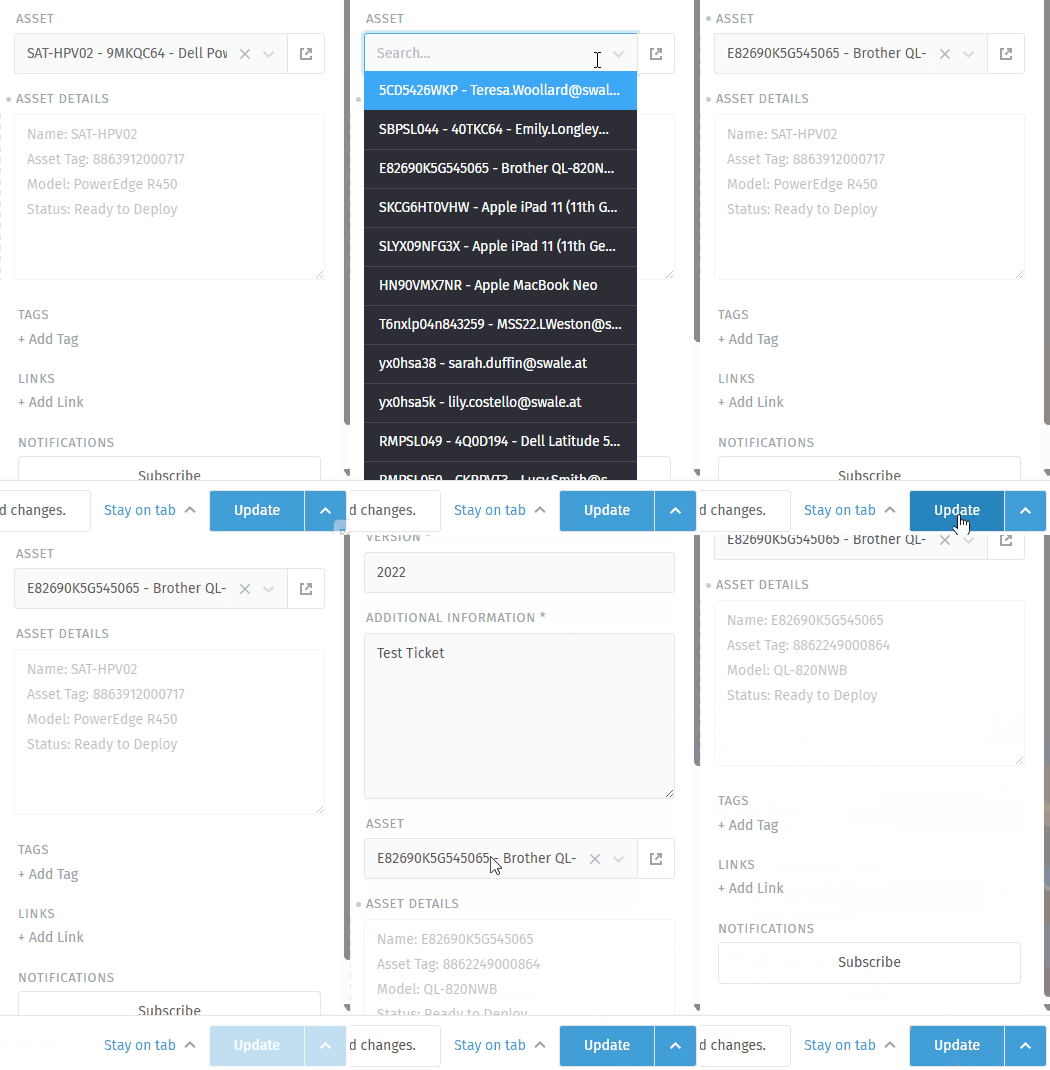
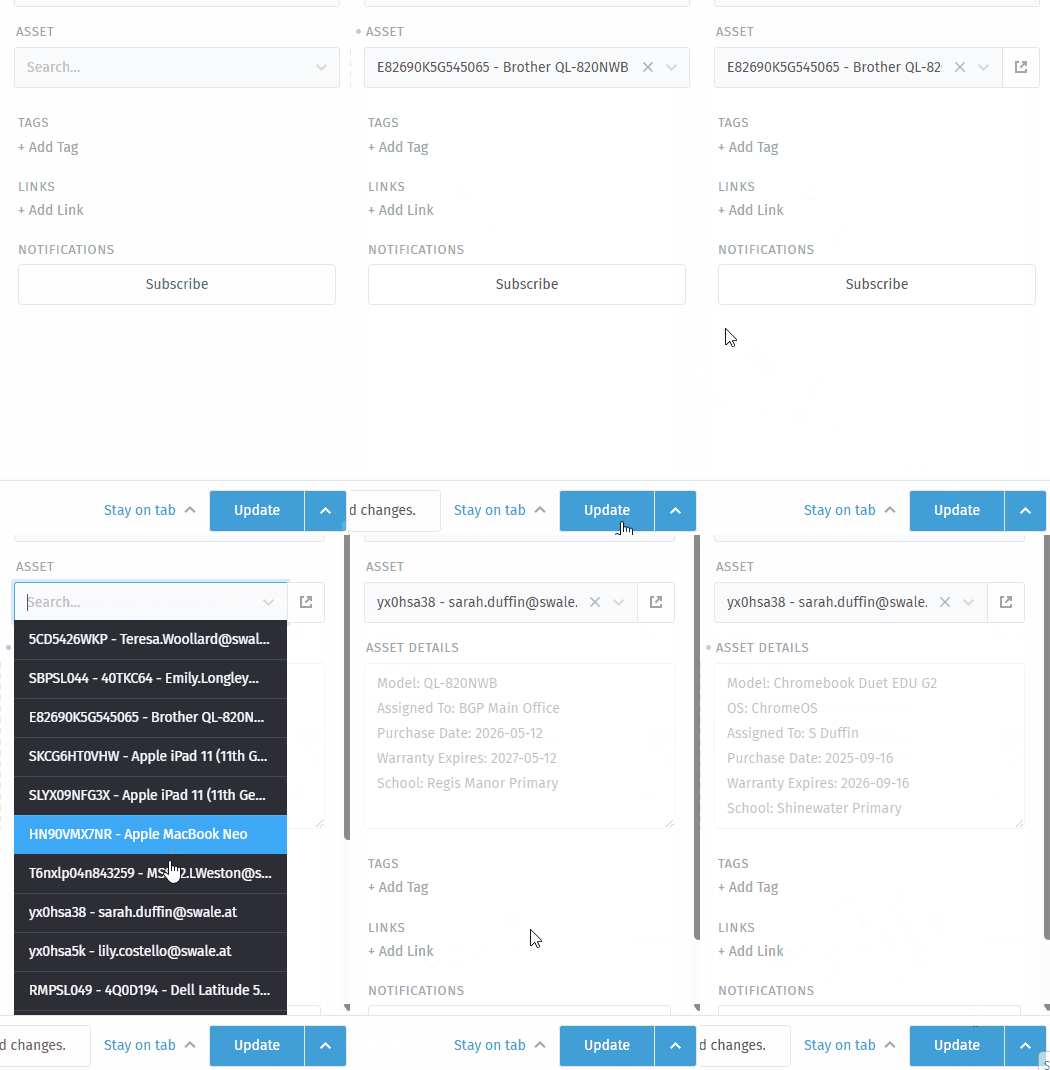
Fairly happy with this version;
How It Works
- An agent (or customer) selects a Snipe-IT Asset ID in Zammad using a Single Select, Tree Select, or External Data Source field.
- A Zammad Webhook fires to a local Python FastAPI server.
- The Python script queries the Snipe-IT API, extracts fields based on the asset’s specific category (e.g., Laptops vs. Desktops), and formats them.
- The Python script pushes the formatted text back to a read-only Zammad
textarea via the Zammad API.
Step 1: Zammad Object Setup
You will need two custom objects on the Ticket level:
- The Trigger Field: This is where you select the asset. It can be a Select, Tree Select, or External Data Source field. Crucially, the underlying
value passed to the database must be the Snipe-IT Asset ID. (e.g., global_asset_search). I’m using an External data source field, as I need a lot of data available in Zammad - But if you only have a few thousand assets, a Single-Select field should work fine.
- The Display Field: Go to Settings > System > Objects and create a single Textarea object named
asset_details. This should be hidden by default (untick all the “shown” boxes).
Step 2: Zammad Core Workflow
To keep the UI clean, we only want to show the asset details when there are details to show.
- Go to Settings > System > Core Workflows.
- Condition: Ticket →
asset_details (or your trigger field) → is not empty.
- Action: Ticket →
asset_details → Shown and Read-only.
Step 3: The Python Middleware
You will need a server (or the Zammad server itself) running Python 3. Install the required libraries: pip install fastapi uvicorn requests
Create a file (Mine is api.py) and paste the following code. Be sure to update your API URLs, Tokens, and customize the ASSET_CATEGORY_MAP to match your specific Snipe-IT custom fields.
For Snipe-IT, generate a token as a user with just read permissions to your data.
For Zammad, the token will need ticket.agent access in order to write to the object.
from fastapi import FastAPI, Request, BackgroundTasks
import requests

app = FastAPI()

# --- CONFIGURATION ---
ZAMMAD_URL = "https://zammad.yourdomain.com/api/v1"
ZAMMAD_TOKEN = "YOUR_ZAMMAD_TOKEN"
SNIPE_IT_URL = "https://snipeit.yourdomain.com/api/v1"
SNIPE_IT_TOKEN = "YOUR_SNIPE_IT_TOKEN"

# Map Snipe-IT categories to the specific fields you want to display.
# Use dot-notation for nested JSON (e.g., 'model.name' or 'custom_fields.Operating System').
ASSET_CATEGORY_MAP = {
    "Laptop": [
        ("Model", "model.name"),
        ("OS", "custom_fields.Operating System"),
        ("Assigned To", "assigned_to.name"),
        ("Warranty Expires", "warranty_expires.formatted")
    ],
    "Desktop": [
        ("Model", "model.name"),
        ("Location", "location.name"),
        ("OS", "custom_fields.Operating System")
    ],
    "DEFAULT": [
        ("Asset Tag", "asset_tag"),
        ("Model", "model.name"),
        ("Status", "status_label.name")
    ]
}

def extract_field(data, path):
    """Safely extracts nested dictionary values using dot notation."""
    keys = path.split(".")
    val = data
    try:
        for k in keys:
            if isinstance(val, dict):
                val = val.get(k, "")
            else:
                return ""
        return str(val).strip() if val else ""
    except Exception:
        return ""

def sync_snipeit_to_zammad(ticket_id: int, asset_id: str):
    snipe_headers = {"Authorization": f"Bearer {SNIPE_IT_TOKEN}", "Accept": "application/json"}

    try:
        response = requests.get(f"{SNIPE_IT_URL}/hardware/{asset_id}", headers=snipe_headers)
        response.raise_for_status()
        asset_data = response.json()

        category_name = extract_field(asset_data, "category.name")
        mapping = ASSET_CATEGORY_MAP.get(category_name, ASSET_CATEGORY_MAP["DEFAULT"])

        details_list = []
        for label, path in mapping:
            val = extract_field(asset_data, path)
            if val:
                details_list.append(f"{label}: {val}")

        formatted_details = "\n".join(details_list)
        if not formatted_details:
            formatted_details = "No configured asset details found."

    except Exception:
        formatted_details = "Error retrieving asset details from Snipe-IT."

    zammad_headers = {"Authorization": f"Token token={ZAMMAD_TOKEN}", "Content-Type": "application/json"}
    update_data = {"asset_details": formatted_details}

    requests.put(f"{ZAMMAD_URL}/tickets/{ticket_id}", headers=zammad_headers, json=update_data)

@app.post("/webhook/sync-asset")
async def sync_ticket_asset(request: Request, background_tasks: BackgroundTasks):
    payload = await request.json()
    ticket = payload.get("ticket", {})
    ticket_id = ticket.get("id")

    # Replace 'global_asset_search' with your Zammad trigger field name
    raw_asset_data = ticket.get("global_asset_search")

    if not ticket_id or not raw_asset_data:
        return {"status": "ignored"}

    # Extract the ID safely (Handles Strings, Dicts, and Tree Selects)
    asset_id = ""
    if isinstance(raw_asset_data, dict):
        asset_id = raw_asset_data.get("value", "")
    elif isinstance(raw_asset_data, str):
        asset_id = raw_asset_data.strip()

    if asset_id:
        # Pass to background task to prevent webhook timeout
        background_tasks.add_task(sync_snipeit_to_zammad, ticket_id, asset_id)

    return {"status": "accepted"}
Run the server using Uvicorn: uvicorn api:app --host 0.0.0.0 --port 8000
Step 4: Zammad Webhook
Finally, tell Zammad to notify your Python script when an asset is selected.
- Go to Settings > System > Webhooks and create a new Webhook.
- Endpoint:
http://YOUR_PYTHON_IP:8000/webhook/sync-asset
- Events: Ticket Update
- Condition: Ticket →
global_asset_search (or your trigger field) → has changed.